Today, formed, stamped or injection-molded parts often have to be produced with tolerances of a few 100ths of a millimeter and without surface defects. Manufacturers face the challenge of documenting the quality of each individual part. The variety of small parts, which are usually processed in bulk, makes automated inspection with a single system virtually impossible.
Automated inspection without additional handling
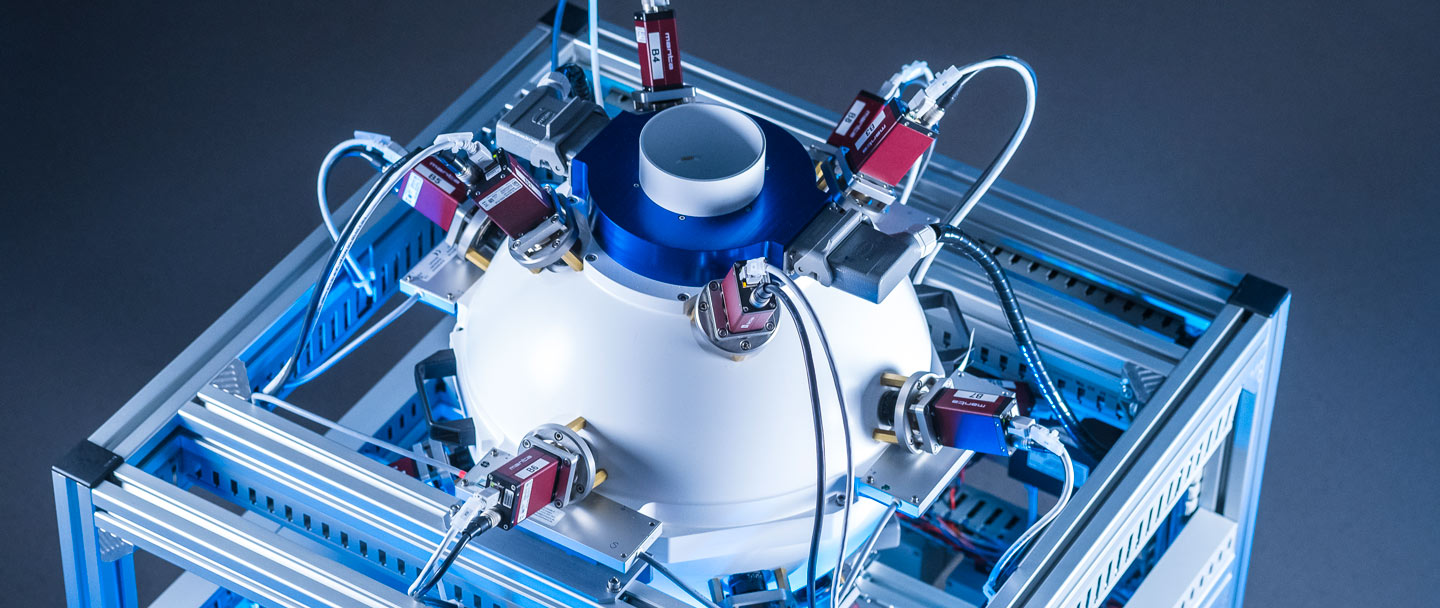
Inspect-360° HR enables the inspection of small components without the need for further handling – and largely independent of type. The parts to be inspected are transported individually into a hollow sphere via a conveyor belt. There, they are inspected simultaneously from all directions in free fall with the aid of 16 cameras. In the process, they are diffusely illuminated and appear free of shadows and reflections even if the surface is bare or coated with oil. The parts pass through the measuring volume every second in any orientation – no specific handling is necessary.
Objects up to 60 mm in diameter can be inspected in the system. Using real-time image processing, the 2D images acquired from different perspectives are mapped to the known CAD model and evaluated. For each 2D image, the deviation of the external contour to the CAD model of the respective view is calculated. Thus, dimensional accuracy errors can be detected immediately. The texture of the parts is analyzed using AI-based anomaly detection. Anomalies on the surface can thus be quickly detected, which is already a great benefit for many applications.
To inspect small parts up to 30 mm in diameter with a tolerance of a few 1/100 mm in free fall, an almost microscopic optical resolution of 15 µm is required. For this reason, the inspection sphere of the Inspect-360° HR has particularly small dimensions; this keeps the component's fall speed, and thus the influence of motion blur, low.
Micrometer precision in the production line
Inspect-360° HR is suitable for inspecting formed small parts such as plugs, screws and bolts as well as injection-molded plastic parts. Dimensional and texture defects as small as approximately 30 µm are detectable. A single system can be used to inspect different parts without having to adapt the hardware. Small parts can be inspected inline every second, allowing direct intervention or feedback into the process. Inspect-360° HR can also be used to monitor and significantly shorten the setup and warm-up phase of a process. This can increase production efficiency and reduce scrap.
Inspection of surface cleanliness and coatings
For the inspection of surface cleanliness and coatings, Inspect 360° can be combined with the free fall inspection system F-360° from Fraunhofer IPM. The imaging inspection system uses fluorescence measurement for spatially resolved detection of impurities and measures the thickness of coatings. By combining the two systems, the components are inspected in a single measurement run.
